Monday, January 23, 2012

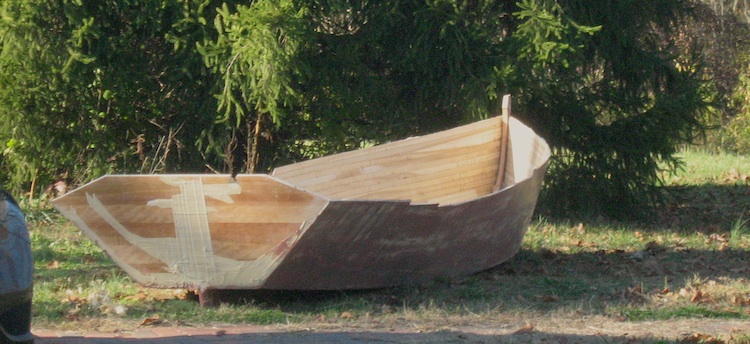
Mississippi River Skiff update: cutwater

Yesterday we formed and brazed the cutwater for the skiff.
Here is the piece before installation.  We also drilled and counter sunk 4 holes.  It will be screwed to the cherry bow.
To see the blog entry and a photo of the bow stem before it was installed, click this link:
River Skiff Bow
Last night we bedded the brass in West Systems 407 thickened epoxy and screwed it in.

Ramming speed!


The piece relaxed a bit but will have more curvature when it is installed.

Saturday, January 21, 2012

Shop work / Skiff cutwater

Being all wintery out today we started some shop projects.
One project was the installation of a pneumatic hoist in the rafters to help with lifting boats.
We had a German JDN hoist rated for 1500 pounds.  There is a steel I-beam running across the open framing of the garage.  I simply drilled a hole in the bottom flange and attached the hoist.
Pneumatic hoists are fantastic devices.  They are smaller than electric hoists, very reliable and run on about 90 psi.  We found this one on e-bay a few years ago.
It immediately became useful.  We lifted the skiff off the trailer and suspended it 2 feet off the ground so we could instal the cutwater.
JDN hoist

Cold forming the cutwater by bending the brass to the band saw wheel.
Chapelle's lines indicate the same arc as the saw's wheel.

Marking the cutwater for a cut.
The brass is 1 inch wide by 1/4 inch thick.
It was purchased at Shapiro Supply in St. Louis

The stem piece will be brazed to the cutwater and screwed into the deck.


Saturday, January 14, 2012

Making the oar's handle

Today we braved the cold to work on the oars for the river skiff.
The blanks were first trimmed to the profile we designed.  The band saw is almost ready to use.  But today we were limited to a jig saw.
After the blades had their rough shape we ran them through a radius router bit. Then it was back to the bench to form the handles.
Here is a video of that process:


Tools used are a 7 inch variable speed disk sander with a 36 grit disk.
We also used a 6 inch orbital sander with 80 grit paper.
Additional sanding will be needed but the handle took 6 minutes to form.
During my visit to Hemel in Seattle I saw Steve forming surfboards.
It was a revelation to see this.  He used this type of disk sander and had the speed very slow.  This removes material slowly and allows more control.  A huge added benefit is the life of the disks is vastly extended because of less heat generated.  Previously I had used angle grinders for this type of work.  They remove material but they spin at about 10,000 rpm.  Way less control and you go through disks like tissues.
In this video the rough oar blank is run through the radius router bit to get it closer to round.

Wednesday, January 11, 2012

Mississippi River Skiff update: OarLocks

The pinion of the oarlocks are set 12.5 inches past the edge of the rowing stations.
This is the distance we find best for the stroke geometry in this hull.  If they are set farther abaft you get less reach forward with the oar.  Farther forward and it is too tight.
There is a lot of variation of opinion on the best distance, this is our opinion and our boat.


This weekend we will be sanding the interior to prep for varnish and working on the oars.
Here is a picture of the oar blanks (and a Greenland paddle).  The Ash and cherry look good together.

Saturday, January 7, 2012

Mississippi River Skiff update: out of the shop

Yesterday we moved the skiff out of the shop onto a trailer with the help of the visiting students.  The trailer came with our 14 foot Rhodes Bantam.  The Bantam is on blocks so we could use the trailer.

The only problem is the length of the skiff.  At 18 feet 3 inches it extends way past the end of the trailer but more problematic is the wheels are too far forward.

Today we are going to set the skiff on the ground and reconfigure the trailer.
We can move the wheels back about 2 feet.  This should balance things out.

Today we are also going to instal the oarlocks.  We found a set of four at the Nautical Consignment shop in Oriental, NC.  They are old galvanized locks that are in great shape.  I was looking for bronze, but  of course this skiff historically was a working boat on inland rivers and would have been fitted out with the most practical cheapest hardware available, so galvanized it is!
Finishing out the interior, then hull priming and paint


Thursday, January 5, 2012

Boat class:

The Principia School has a boat building class.
The instructor, Dan Sheets, is having the students design dinghies and kayaks themselves and tank testing the results.  Through experimentation they arrived at four hulls they are going to build.
Today was warm and a good day for a field trip so they came up from St. Louis to visit Elsah Boat Corporation.
We had a great visit talking about wood, strip and stitch and glue construction and dogs.
I hope to see their launch day.
Let me know when it is!

Thursday, December 29, 2011

Oriental, NC

For a couple of years I have been a regular visitor to the TownDock.
It is the web site of the town of Oriental, North Carolina.  As an avid sailor I just randomly found this site.  Once I did I was hooked.  It is a very small town on the Neuse river and Pamlico sound.
The excellent web site is like a daily news paper.
My family had this week free so we found a house to rent and made the long drive from St. Louis to check it out. (1017 miles)
It is a great place.  The big protected water of the Neuse and Pamlico sound is perfect for sailing, and of course the weather beats the Midwest.
Unfortunately the skiff was not ready for the trip so we will plan a return visit.
Tomorrow we are hoping to rent an FJ to sail.  It is going to be sunny and 61 degrees!
We might be raising the anchor on Elsah Boat.
Pugh house, our base in Oriental.
Oriental harbor


The NCMM in nearby Beaufort
The Watercraft Center in Beaufort and some of their lovely boats...

At Fort Macon, Beaufort, NC.


Thursday, December 22, 2011

Mississippi River Skiff update: lilly pads

Seats are edged with the black oak and installed.  We salvaged an old chair with nice turned legs.  Two of these are used as supports for the two rowing stations.

I like the Johnson Wax building by F.L. Wright, so we set the posts with the taper down like his lilly pads.
The Walnut base that was laminated to the sole of the boat is directly under the center of the seats.  We set a laser plumb on the base to find the spot to drill the seat.
This was marked, the seat was taken to the drill press and a forstner bit was used.  The depth was set at half way through the Walnut. 
Installed
Lilly pad
After both holes were drilled we measured for the turnings and cut them to fit.
Once everything fit tightly, an adhesive fiber epoxy putty was used.  Bronze fasteners will be added to the side blocks after everything hardens.

Friday, December 16, 2011

Mississippi River Skiff update: seats


Today we did the glue-ups for the seats.
Some figured walnut boards are used for the seats and they are edged with black oak to match the gunwales.
The hull exterior will end up with an Interlux Perfection Oyster White paint job.  This will set off the varnished walnut.
The hull is getting stiffer with the gunwales in place, and will get very stiff with the seats installed.

The weather has cooled a lot so we are heating when needed.
The laminations each get a turn in front of the kerosene heater.
Winter !

Rough glue-up of the transom seat.  It will get edging and the profile will get some curves.

Chalks are laminated into the floor to accept and hold in place this great old tank we got.
It will get a refurbishment and a new lease on life.

Wednesday, December 14, 2011

Ship's wheel

We got a commission for a commemorative ships wheel.
Never had the opportunity to build one before, so we jumped at it.
After looking at two from a nautical antique collection we designed an improved version.
The ones we looked at were light weight with toy looking spokes.
So the new wheel is made of 8 quarter cherry.  Super chunk.
Charlie at Industrial Machine Sales had an awesome lathe part the we are using as a hub.
It's tool steel not bronze, but this thing is going to be hanging on a wall in Missouri.
I did that once. 


Sunday, December 11, 2011

MRS update: gunwales / seats

Yesterday we laminated the second layer of black oak to the gunwales.  Instead of epoxy, we used Titebond 3.  I am a big fan of 3.
It has a formulation that has more body to it when it is set.  It also has a dark brown color which disappears in joints.
After the the clamps were removed we went to work with the power planer to bring the gunwale into proper form.
It took about 15 minutes.  According to J Henry, you can't beat power tools.
Later we will dress the top with a sanding block and drill holes for the oar locks.

Tomorrow we will prepare to glass the interior's sides.  Before we start that we just had to see the boat with the seats in, so we cut walnut for the rowing stations.  They were set in and we had a short imaginary boat ride.
Before the seats are installed, both the leading and trailing edge of the rowing station seats will get a black oak trim piece.  The light color of the oak will look great framing the dark walnut.
Gunwale without exterior trim
After a little block sanding it will be ready for a round-over bit.

Walnut seat with oak trim piece

Friday, December 9, 2011

MRS update: hull interior

We glassed the sole and decided to install the seat supports before glassing the interior's sides.
Otherwise we would have ended up with secondary bonds on these stress points.
This will make the glass work more difficult but will yield a stronger boat.
Pieces of cherry were cut to the bevel and curve of the hull.
These were epoxied in place to support the two rowing stations as well as the large U shaped rear seat.

For the bow deck structure, we matched the size of the deck Chapelle indicated on the sailing version of this hull.
Instead of supporting a mast partner, this deck is for storage and a platform for sitting or standing.
It will be great boat for fishing.
A bulkhead of fir ply was cut and tabbed in place.
The deck lid will be removable.  This will be a lockable area and will hold quite a bit.
We are not planning on installing permanent floatation.  I would like the boat to look more traditional.  Instead we will have a removable floatation bladder in the bow deck and a bladder attached under the transom seat.

The gunwales are made of black oak.
We picked up a few boards yesterday.  This morning they were cut to half inch strips.  Their height is 1.25 inches.  Two strips will be laminated to make the gunwale on the interior of the shear.  The exterior piece will be cut and laminate later.
This thickness looks right proportionally and will allow enough room for the bronze oar locks.

Transom seat support

Here are the additional strips of black oak for the gunwales.

Bow deck enclosure.  The interior was glassed prior to the bulkhead installation.

Sunday, November 27, 2011

Mississippi River Skiff: update

The exterior of the hull has been glassed, kevlared, and faired.
We removed it from the forms and got our first ever look at this hull form.  Are there any other Mississippi river skiffs of Howard Chapelle's lines out there?  It is on page 99 of his ASSC.
Let us know.
We like it.
The hull was stripped above the shear.  The plan is to cut the shear after all the glassing is finished.
The strong back is being taken apart and removed from the shop.
We will get the hull back inside and begin sanding the interior and prepping for the interior glass.
Next, we will be forming the thwarts, seats, and bow deck enclosure.


Friday, November 18, 2011

32 inch Band Saw !


My word, this is a large saw.  After a search,  my friends Charlie and Rusty at Industrial Machine Sales in Alton found all the parts for the old saw.   An earlier posting (May 16th) shows the 1937 Red Fox planer we acquired from Charlie.

As we were fastening the saw to a pallet, we removed the old rusty guards.  I initially thought it was a Crescent saw, but it turns out it was made by Silver Manufacturing Company of Salem, Ohio.  There is a nice brass plaque that says so.
It has 32 inch diameter wheels and a blade length of over 17 feet! 
Here is a great website about vintage American woodworking machinery: 
After looking through their database, it appears the saw was made between 1904 and 1910.
We will be taking it apart, grinding off some ugly welds and prepping for a new paint job.
This saw will be a welcome addition to the boat shop.

It has Babbitt bearings that still spin freely.  That's old-timey.
Hanging in the Mulberry tree.
With the table and motor, maybe 750 pounds?


This is an ad from 1910, same saw.

Tuesday, November 15, 2011

Mississippi River Skiff update:

We just glassed the MRS.  After a final fairing and sanding, we glassed the hull with 9oz glass cloth set in low viscosity Raka epoxy with a slow hardener.  This gave us plenty of time to roll out all the wrinkles with a ridged roller.
After three hours we gave it a thin fill coat to fill in the weave.  After another three hours had passed, the surface was slightly tacky and we rolled out the pre cut Kevlar for the bottom.  This received the same epoxy treatment.  It was then three am. so we called it a night.
9oz cloth, originally 50 inches wide, cut down to overlap on the centerline.

The skeg has a 3/4 inch fillet for strength and to ease the layup.  The glass laps in both directions.

The Kevlar bottom will allow for some rough landings.